After building the curves, I decided to do some quick growth tests to test how the growth would look. Before building any complex tool, I just used a simple carve SOP to make the curves grow from point A to point B.
This doesn't have any overlap and isn't too interesting, but it kind of just proves that the carve SOP will almost definitely be used for this solver. Take a look here:
Next, I wanted to see how the growth would look with an offset, I did this manually with each curve to start with, getting the carve to grow at slightly different times. I also added a quick splash of colour to get it to look like the original idea just for this test. Here's how that looked:
You can see there that there is quite a fair amount of overlap, which I'll sort out once I have an idea of how the growth will work.
As these were cables, I wanted the cables to have cable attachments (like an RJ-45 ethernet connector etc) so I did a little test that attached a piece of geometry to a point. It used an up vector to keep the geometry facing the right way, no matter where the point moved.
Got that little trick from Tighe Rzankowski over at SideFX here. He attached a hose nozzle to a hose cable using this trick. Here's how it looks in Houdini:
Now, I'm not sure I'll use this in the final thing as I kind of prefer it without the cable connectors, but we'll see!
After researching for quite a while, I found a gif that showed exactly what I needed to make. After looking into it it turned out it was a really great plugin for Cinema 4D that parametrically wraps curves around an object. You can add noise and variance and all sorts, meaning it's super fast and does exactly what I need it to.
The tool is called spline wrapper for Cinema 4D. Here's a video about it:
So I fired up Cinema 4D and played around with the plugin. I created a test of a foot and wrapped a number of curves around it, altering options to make it look more natural. Here's how that looked:
However, to do this all properly, the plugin needed a 'backbone' curve that ran through the centre of the object so it could tell which direction to wrap the curves. The object also needed a relatively good UV map to base it noise and scale variance on. Good topology helped as well.
My workflow ended up being; Separate parts of the body in Maya, eg, foot, mid leg, upper leg etc, then dynamesh and zremesh in ZBrush, then UV in Maya, then export to C4D.
After trying this out on a test pose, here's how it looked:
I decided not to go with this as the final pose/curve selection as the pose wasn't dynamic enough and I discovered I could make the curves more random in terms of scale, which would fit better to get that wild cable look.
The brilliant thing about the plugin was, I could choose how many curves I needed and how many times to wrap them around, so I could change this to fit different parts of the body.
It was a fair amount of work getting each of the body parts set up and wrapped, but it was worth it as the final result looked really good. I based the final pose on this silhouette from Google, which was really dynamic and so much more interesting than a regular pose:
Here's how the final curve setup looked, all that's left to do is fire up Houdini and build a solver to get these to grow dynamically. (I created the ponytail manually in Maya, which was quick enough and gave me more freedom to choose where the curves were placed.)
There is a fair amount of overlap on the curves, but I should be able to sort that out in Houdini. Let's hope, eh?
As procedural growth was something pretty new to me, I did some tests of how I might create the initial curves/growth.
As this was both before and after deciding on the final look of the character, all these tests don't always relate to the final design. Some are experimental and some are just for fun to be quite honest!
For one of these tests, I had the idea of simulating multiple wires wrapping around my geometry. The wire solver is usually pretty fast and accurate, so I tried it with one wire and just a leg to begin with. However, it seemed inefficient for the amount of curves/cables I needed to create and too 'plain'. So, this idea went on the backup list, here's an example below:
In another test, I used the same theory of wrapping an object round geometry with simulation, however this time, I tested out an idea from someone on the SideFX forums and used the grain solver. It wrapped around the object, and stuck to it using a pop network and some VOPs. However, again, this would prove quite inefficient for the amount of curves I needed and wouldn't quite give the right effect. Maybe if I was creating an ancient Egyptian mummy? Anyway, here's an example of that:
After asking around on forums, there was a great idea from a user on odforce, to use a normal shortest path growth solver, compute the flow direction and then cross the normal position with the flow direction to get a spiraling effect. I'll be honest, this was a little over my head, but after looking what this created, it seemed too robotic and calculated. I'm sure with some noise and variance, it may have been better, but again, not the best solution. Here's how that looked:
Now this next test was extremely useful and something I would later go on to use to create the final thing, after further researching growth, I discovered the space colonization algorithm. This bases growth from a start point through scattered points using the basis of food. With a few parameters stated, the solver grows outwards looking for the nearest food attribute and draws a line between those two points. It keeps going until it reaches a point where there is no more food within it's given reach and stops growing. This creates a really nice look and I'll use it to create the wire armature that grows underneath the cables. Take a look:
That's it for now folks, next post I'll be talking about the final technique I'm using to create the cable growth.
After thinking I had settled on a character idea, I decided to do a bit of further research into real-world wire sculptures and make sure that was the sculpture I liked the most.
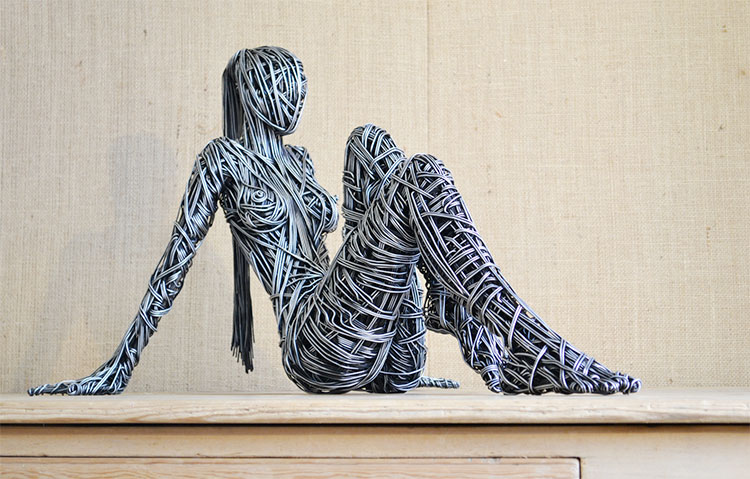
After spending a while on Pinterest, I saw a sculpture that really caught my eye. It was difficult to find as it was only 300 x 300 pixels so I had to do a reverse image search and find out what it was.
The sculpture is called 'Connected' by Kasey McMahon. I really like the look of it and feel it has some underlying messages that will fit well with this surreal sequence. This is what I will be basing my procedurally grown character on. Take a look below:
The description of the character states that it's Ethernet and other cables wrapped around a steel armature. I think it'll be interesting to grow a wire armature and then wrap cables around it, so I'll be basing the wire armature on the sculptures by Judit Rita Rabóczky:
Overall, I think the combination of these two concepts will work well and will be interesting (maybe a space colonization algorithm in there?)
So modelling for this project is pretty straightforward, nothing too complex or time consuming.
All the items I'm modelling are real world items which gives the whole thing a more realistic feel rather than plucking ideas out of my head or spending more time designing new items. It also means I can use real-world reference to model to a realistic standard.
I generally went for very modern items to add to the clean, minimal vibe of the apartment, but didn't stick to that completely as humans aren't perfect and I wanted to show that someone really lived there.
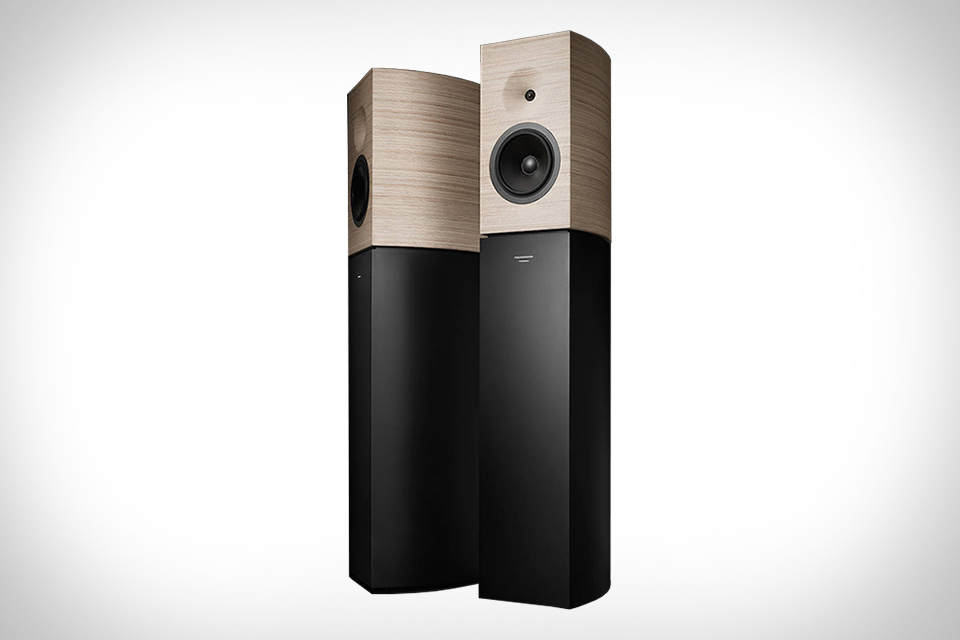
Here's a few examples of the real-world items I'm modelling:
So I've pretty much completed all of the modelling at this stage and layout is fully complete. It has skylights and a rather large side window to get that really light and spacious feel when it comes to the lighting stage. It'll also get some really interesting shadows falling onto the subject.
That idea came from references of Chinese minimalist interiors, which I fell in love with after seeing. However, I'm not sure I'd have it myself as it doesn't have that 'cosy' home feeling and runs the risk of feeling very empty. But I guess that's minimalism... The image below was a heavy inspiration:
All of the modelling is to a pretty realistic standard, the topology is sound and all of it is 100% sub-divable, to get that extra level of quality in Arnold/Mantra. Texturing will come later in the pipeline, but I wanted to have the scene modelled first so I could have it ready for sim collisions etc.
Here's a test render of the finished apartment modelling:
Now on to the more exciting stuff, see you next time. Cheers.
Hello there, thanks for joining me on this journey through my final year project. Admittedly, I did start this blog a little late as I'm around half way through the project, but I thought it's better to have it now, than not at all.
To start with, I blocked out the scene by doing some quick models and using a few free models from the internet to save time. I also added some viewport lights and textures in Maya to get a quick idea of the lighting and just to make it look a little bit prettier I guess.
Here's what it looked like:
Before even starting this project, I'd decided on the music I wanted to use; "The Doomsday Theme" from Doctor Who in 2006 (written by Murray Gold), which I used to be a big fan of, but not so much these days. You can listen to that here
Next I did a quick sim to get an idea for how the character might grow, originally it was going to be heavily based on this wire sculpture from Richard Stainthorpe and the whole thing was going to an organic growth representation of this. It would combine muscle like structure with the structure shown below.
Just for the pre-vis however, I ended up doing a simple shortest path growth solver to create a quick growth for the pre-vis. Here's how that looked in Houdini:
However, after creating this growth with the carve SOP and writing it out, it was too slow and too large in terms of file size to justify it for a pre-vis. As a quick space and speed saving cheat, I saved out the final form as static geometry, then used a moving sphere with a mountain SOP as a bounding object to delete primitives that aren't selected and make it look as if it's growing. Yes, this does look a bit tacky, but it's the pre-vis right?
Let's take a look at that, a simple sphere used as a bounding object to delete non-selected primitives:
All that was left to do after this was to pop it into Maya using an alembic and get started on the cameras.
The cinematography was heavily based on Wes Anderson's work and his obsession with symmetry, as I feel lots of symmetry will fit really well with the surreal, minimal vibe of this apartment scene. I also took a lot of inspiration from David Fincher's films, like The Social Network and Gone Girl, the whole cinematic style they use just works so well.
Overall I want the cameras to be simple, slow moving and really show of the growth of the character. I'll be using the old 2:35 aspect ratio to add a cinematic vibe to the whole sequence, luckily for me that saves on render time too.
This pre-vis isn't 100% concrete, and the cameras will need a lot of work after final layout and assembly. I'd love to have the cameras completely finished at the start, but the nature of a procedurally grown character means I can't really finalize the cameras until I have the final growth solver built. I want to get some nice close up shots of the growth but can't do that until it's complete really, guess I'd better get on with it...
So here's the final pre-vis if you want to have a look, the advert approach at the end is just an idea and may not make the final cut. I'll think about that later...